Easy Chocolate Covered Oreos: Your Ultimate Customizable Treat
Are you searching for a dessert that’s effortlessly elegant, incredibly delicious, and endlessly customizable for any occasion? Look no further than
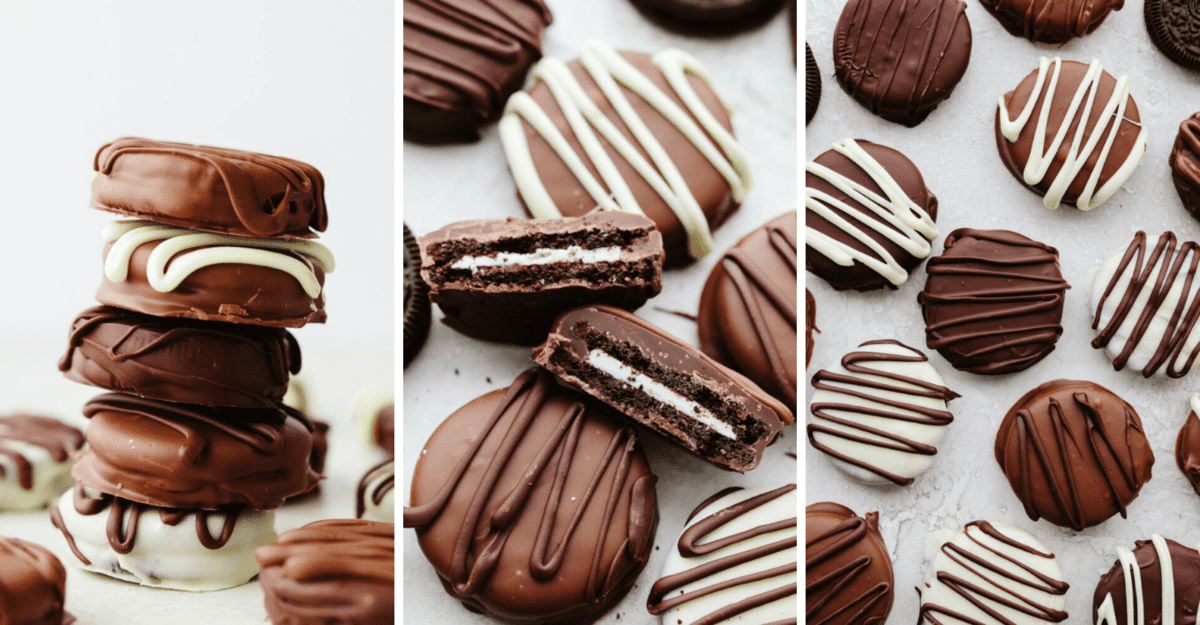
chocolate covered Oreos! These delightful confections combine the beloved crunch of classic Oreo cookies with a decadent shell of rich chocolate, creating a treat that's impossible to resist. Whether you're planning a grand holiday feast, a casual get-together, a special celebration, or simply craving a sweet escape, these eye-catching cookies are guaranteed to be a sensational hit.
If you have a fondness for the iconic chocolate sandwich cookie and a deep appreciation for melt-in-your-mouth chocolate, then this recipe is about to become your new favorite. Chocolate-dipped Oreos offer a perfect symphony of textures and flavors – the crisp snap of the chocolate coating, the satisfying crunch of the cookie, and the creamy sweetness of the Oreo filling, all harmonizing in one perfect bite. Best of all, they're surprisingly simple to make, requiring just a handful of ingredients and minimal time in the kitchen. Dive into the world of homemade chocolate covered Oreos and discover a versatile dessert that’s as fun to make as it is to eat!
Why Chocolate Covered Oreos Are Your Go-To Treat for Any Occasion
Chocolate covered Oreos have earned their spot as a dessert superstar, and for good reason. Their unparalleled ease of preparation coupled with their universal appeal makes them an ideal choice for virtually any event or craving. Forget complicated baking projects or messy dessert bars; these no-bake wonders come together with surprising speed and simplicity. All you truly need are your favorite Oreos, a good quality chocolate, and whatever delightful toppings spark your creativity.
One of their greatest strengths lies in their versatility. From elegant wedding favors and festive holiday treats to charming baby shower desserts and everyday after-school snacks, chocolate-covered Oreos adapt seamlessly. They’re also a fantastic activity to enjoy with friends or family, transforming a simple dessert-making session into a fun, interactive experience.
Beyond their ease, the sensory experience of a perfectly crafted chocolate-covered Oreo is truly something special. Imagine that satisfying *snap* as you bite through the firm, glossy chocolate shell, followed by the familiar crunch of the Oreo, and finally, the creamy delight of its filling. It’s a textural journey that stands out from other desserts. Unlike chocolate fondue, which can be messy, or even chocolate-covered strawberries, which require delicate handling and have a shorter shelf life, chocolate covered Oreos are remarkably sturdy, travel well, and can even improve in flavor and texture overnight. This makes them a fantastic make-ahead option for gifting or entertaining. This consistent balance between the chocolate and the cookie is key to their success, ensuring you get a clean, satisfying bite every time without losing that signature Oreo crunch. For guidance on how to achieve that perfect bite, check out our detailed guide on
Mastering Chocolate Covered Oreos: Get the Perfect Snap & Crunch.
The Simple Steps to Perfect Chocolate Covered Oreos
Creating dazzling chocolate covered Oreos doesn't require culinary expertise; it's an accessible and enjoyable process. Here's a breakdown of the simple steps to achieve these delectable treats:
Gather Your Essentials: Ingredients & Equipment
- Oreos: Classic Oreos are perfect, but don't hesitate to experiment with different flavors like Golden, Mint, or Peanut Butter for unique twists.
- Chocolate: The quality of your chocolate makes a significant difference. Choose good melting chocolate or baking chocolate chips (semi-sweet, milk, dark, white, or even ruby chocolate) for the best results. The type of chocolate will dictate the sweetness level and flavor profile.
- Optional Toppings: Sprinkles, chopped nuts, shredded coconut, flaky sea salt, crushed candy, mini chocolate chips, or contrasting chocolate for drizzling.
- Equipment: A microwave-safe bowl or a double boiler for melting chocolate, parchment paper or silicone mats (for cooling), a fork or a specialized dipping tool, and a baking sheet.
Melting and Dipping for Success
- Melt Your Chocolate: Gently melt your chosen chocolate. If using a microwave, heat in 30-second intervals, stirring well after each, until smooth and fully melted. Be careful not to overheat. For a double boiler, place a heat-safe bowl over a saucepan of simmering water, ensuring the bowl doesn't touch the water. Stir until smooth. Proper melting ensures a glossy, even coating and contributes to that desirable snap.
- Prepare Your Dipping Station: Line a baking sheet with parchment paper or a silicone mat. Have your toppings ready in small bowls.
- Dip the Oreos: Using a fork or dipping tool, carefully submerge an Oreo into the melted chocolate. Ensure it's fully coated. Gently tap the fork against the side of the bowl to remove any excess chocolate. This is crucial for a clean finish and prevents sticky bottoms or overly thick coatings.
- Decorate (Optional): Immediately after dipping, transfer the chocolate-covered Oreo to your prepared baking sheet. While the chocolate is still wet, sprinkle on your desired toppings. This is where the customization truly begins!
Cooling and Storage
Once decorated, place the baking sheet of chocolate-covered Oreos in the refrigerator for about 15-20 minutes, or the freezer for 5-10 minutes, until the chocolate is completely set and firm. Once firm, they can be enjoyed immediately.
For storage, once fully set, place the cookies in an airtight container at room temperature for up to a week, or in the refrigerator for extended freshness. Interestingly, many find that the flavor and texture of these treats actually improve after resting a day. To learn more about this phenomenon, explore our article:
Unlock the Secret to Chocolate Covered Oreos That Improve Overnight.
Unleash Your Creativity: Customizing Your Chocolate Covered Oreos
The true magic of
chocolate covered Oreos lies in their boundless potential for customization. This is where you can truly transform a simple cookie into a themed masterpiece, perfectly suited for any holiday, party, or personal preference.
Chocolate Choices
The base chocolate itself offers a spectrum of possibilities:
- Milk Chocolate: A classic, sweet, and comforting choice loved by all.
- Dark Chocolate: For a more sophisticated, less sweet, and richer flavor profile.
- White Chocolate: A creamy, sweet base that can be easily colored with food-grade gel dyes to match any theme or holiday.
- Ruby Chocolate: A naturally pink, fruity, and slightly tart option for a unique twist.
A Kaleidoscope of Toppings
This is where the fun truly explodes! The options are only limited by your imagination:
- Sprinkles Galore: Use colorful rainbow sprinkles for birthdays, red and green for Christmas, pink and red hearts for Valentine's Day, pastels for Easter, or orange and black for Halloween. Thematic sprinkles instantly elevate the cookies.
- Nutty Crunch: Finely chopped nuts like peanuts, walnuts, pecans, or almonds add a delightful savory crunch and earthy flavor.
- Coconut Bliss: Shredded coconut (toasted or untoasted) provides a tropical note and lovely texture.
- Chocolate Drizzle: Use a contrasting chocolate color (e.g., white chocolate drizzle on dark chocolate, or dark chocolate on white) for an elegant artistic touch.
- Candy & Cookie Crumbles: Crush up other cookies, candy canes, toffee bits, or mini M&M's for extra flavor and texture.
- Gourmet Touches: A sprinkle of flaky sea salt on dark chocolate, crushed espresso beans for a coffee kick, or even finely shaved chocolate can elevate your Oreos to gourmet status.
Theme Your Treats
With the right combination of chocolate and toppings, your chocolate-covered Oreos can perfectly complement any event:
- Holidays:
- Christmas: Red or green chocolate (using white chocolate and food dye), peppermint bits, festive sprinkles.
- Valentine's Day: Pink/red white chocolate, heart sprinkles, edible glitter.
- Easter: Pastel-colored white chocolate, mini egg candies, bunny or chick sprinkles.
- Halloween: Orange/black sprinkles, edible candy eyes, spiderweb drizzle.
- Celebrations:
- Birthdays: Rainbow sprinkles, favorite candy crushed, personalized initial stencils.
- Baby Showers: Blue or pink tinted white chocolate, baby-themed sprinkles.
- Weddings/Anniversaries: Elegant white or dark chocolate, edible pearls, gold or silver dust, delicate drizzle.
These customized treats also make fantastic homemade gifts. Arrange them beautifully in a box, and you have a thoughtful and delicious present that shows you care.
Tips for Chocolate Covered Oreos That Stand Out
While the process of making chocolate covered Oreos is straightforward, a few expert tips can elevate your creations from simply good to truly spectacular, ensuring that perfect snap and flawless finish every time.
Choose Quality Chocolate
This is perhaps the most crucial tip. Invest in good quality melting chocolate, baking wafers, or chocolate chips specifically designed for melting. These often contain cocoa butter or other fats that allow for a smoother melt, a firmer set, and a more appealing snap than standard eating chocolate bars, which can sometimes result in a waxy or brittle coating. Tempering your chocolate (a process to stabilize the chocolate's crystal structure) can also lead to a more professional, shiny finish and a better snap, although it's not strictly necessary for delicious results.
Master the Melt
Whether you're using a microwave or a double boiler, melt your chocolate slowly and gently. Overheating chocolate can cause it to seize (become thick and clumpy) or burn, rendering it unusable. Stir frequently, especially in the microwave, to ensure even melting and prevent hot spots. A smooth, fluid chocolate is key for an even coating.
Drain the Excess
After dipping, gently tap the fork holding the Oreo against the rim of your chocolate bowl. This allows any excess chocolate to drip off, preventing puddles around the base of the cookie once it sets. A thinner, even coat not only looks better but also contributes to that satisfying, clean snap when you bite into it.
Cool Them Right
While it's tempting to rush, allowing your chocolate-covered Oreos to set properly is vital. Refrigeration (15-20 minutes) or a brief stint in the freezer (5-10 minutes) is ideal. This rapid cooling helps the chocolate solidify quickly, resulting in a firm, glossy shell. Don't leave them in the freezer for too long, as this can sometimes lead to condensation issues once they are brought back to room temperature.
Embrace the Overnight Improvement
Surprisingly, some recipes for chocolate covered Oreos suggest that they taste even better the next day. This allows the flavors to meld and the textures to fully settle. So, if you're making them for an event, consider preparing them a day in advance!
Creative Serving Suggestions
Don't just eat them plain (though that's perfectly acceptable!). Serve your chocolate covered Oreos alongside a glass of cold milk, or as a decadent addition to a hot cocoa bar. They are also fantastic crumbled over ice cream or milkshakes for an extra treat.
By keeping these tips in mind, you'll consistently create impressive, delicious, and perfectly customized chocolate covered Oreos that are sure to be a showstopper at any party or holiday.
Conclusion
From a simple snack to an elaborate party favor,
chocolate covered Oreos truly embody the perfect blend of ease, versatility, and undeniable deliciousness. This comprehensive guide has shown you just how straightforward it is to transform a beloved cookie into a customizable masterpiece, suitable for every celebration and craving. With minimal ingredients and a little creative flair, you can produce a treat that boasts the satisfying snap of chocolate, the classic crunch of an Oreo, and a creamy interior – a symphony of textures and flavors in every bite.
Whether you opt for a classic milk chocolate coating, experiment with vibrant colors for holiday themes, or adorn them with an array of exciting toppings, these homemade delights are guaranteed to impress. They're not just desserts; they're an activity to share, a gift to give, and a delightful indulgence for yourself. So gather your ingredients, unleash your inner decorator, and prepare to make some truly memorable chocolate covered Oreos that will bring joy to any party or holiday!